• 25290641517 8a53311698 b

    September 17, 2018

    How FLaK Combat Works

    COMBAT OVERVIEW

    FLaK combat is executed using either rattan or polypropylene (at opponent's consent) weapons. This simulates the weight and feel of a steel sword, without incurring the dangers of using a waster or live-steel, allowing FLaK combatants to fight intensely and realistically with greatly-reduced risk of injury.

    Weapon strikes are calibrated to penetrate or damage armor enough that the underlying "meat" has been injured or ruined. Thus, FLaK weapon strikes are quite forceful and akin to getting hit with a baseball bat. Understanding how to deliver as well as how to take a blow is crucial to the learning process. Students will pick these skills up during sparring practice or classes where strikes are delivered to armored areas.

    Fight Like a Knight follows a series of rules and customs that, while making the engagements slightly less realistic, keep combatants safe and prevent thuggishness. FLaK technique emphasizes the beauty, elegance, and grace inherent in swordfighting, and our rules and customs reinforce that as much as possible.

    RULES

    • An individual combatant is responsible for declaring him/herself dead, thus losing the battle.
    • The recipient of the blow will determine if it landed with enough force to cut through the armor and kill/wound.
    • Any sufficiently forceful blow to the head, torso, or inner-thigh is a kill.
    • If a combatant’s arm is struck with an adequate blow, the combatant loses the use of the struck arm and must fight with a single weapon, tucking the injured arm behind his/her body.
    • If a combatant’s leg is struck with an adequate blow, the combatant loses the use of the struck leg and must fight from his/her knees - he/she can move around but can no longer stand.
    • If a combatant’s hip is struck with an adequate blow, the combatant loses the use of the entire lower half of his/her body and must kneel, sitting on his/her feet - he/she can not move at all from the waist down.
    • Blades of weapons cannot be grappled.


    CUSTOMS

    In order to keep combatants safe and uninjured, FLaK members agree to abide by the following customs:

    • Arms, while inevitably getting hit on occasion, are never targeted - too much bone close to the surface that can easily be broken even through adequate armor.
    • Knees and below are also never targeted for the same reason as above.
    • The recipient of the blow has the final say in the quality and efficacy of the blow.
    • Shields will never touch your opponent’s body.
    • Basket-hilts/hafts will never touch your opponent’s body.
    • A fallen opponent is asked to yield rather than be attacked.
    • Slow-work and sparring will only go at the speed and intensity agreed upon by your partner.


    [ Read more ... ]

  • Bavinshield

    April 16, 2018

    DIY: Bavin

    In this DIY you will learn how to make a basin, or training weapon, from rattan and some tools/materials commonly found at your local hardware store.

    Introduction

    Historically, medieval fighters trained with weighted weapons, typically made of carved hardwoods, called "bavins."  Other terms, such as "bevins," "cudgels," and "wasters" are also common for these training weapons.  Needless to say, training with real weapons would have dramatically reduced the number of warriors an army could field, although, arguably, those who survived training would surely be the best of the best... or perhaps merely the luckiest.

    Materials

    The following materials will be used in the construction of your bavin.  You may substitute if necessary, however, balance, durability, and overall efficacy of the weapon will most likely change if substitutions are made.

    • 1-3/8" or thicker rattan (30” to 38” long, depending on your height)
    • 1” to 2” wide strapping tape
    • Two colors of duct tape (I use black as a base color, and I like Gorilla Tape for that, but you can use any brand and any color that is different than the other)
    • Wood Rasp
    • 20” nylon cord
    • Lighter or matches
    • Marker (Sharpies work great)
    • OPTIONAL: Welded steel or molded plastic basket hilt
    • OPTIONAL: Two 2" stainless-steel hose-clamps (only needed with basket hilt)

    All of these items are readily available at a hardware store, except the rattan.  You can find that at a cane and basket making supply store such as Cane and Basket Supply in Los Angeles.  Rattan is important as it is both durable, weighty, flexes nicely, and has a nice, thick skin to keep it from fraying.

    You may substitute a hardwood pole for the rattan, but it will be much more prone to disintegration and breakage, and could become dangerous.

    Construction

    Following these simple steps will ensure that you make a safe weapon which will last as long as possible while being in conformance with safety and usability standards of FLaK.

    1. Court the rattan (video) - Find the natural pull of the blade due to the inherent density of the rattan. Once you have found the way the rattan wants to lay, grip it as you would a sword, with the proximal knuckles of your hand aligned with the fore-blade and “V” formed between your thumb and index finger aligned with the back-blade. Mark (using a Sharpie or pencil) the fore-blade and back-blade with a line.
         Your browser does not support the video tag.
    2. Mark the hilt - While still holding the sword (as described in Step 1), mark around your hand (including the fingers) with a Sharpie or pencil. This will make a guide for where you will carve out the grip of your sword.
      “Gripping
      “Outlining
      “Outlining
      “Outlining
    3. Reinforce the blade - Starting at the tip of the blade, begin wrapping individual bands of strapping tape. Pull the tape as tight as you can, and allow it to overlap on itself a bit (an inch or so). There is no need to do more than a single wrap per band. Do this all the way down the blade, spacing the bands by approximately 1/2”, stopping about 2”-3” from the grip you drew in Step 2.
      “Reinforcing
      “Blade
    4. OPTIONAL: Create a thrusting-tip:
      1. Stack enough 2” discs of closed-cell foam to make a tower 2.5" to 3.5" tall. You can glue them together, but it is not necessary, and it may make the tip more stiff.
        Thrusting-tip discs
      2. Now take two 24” to 30" long lengths of strapping tape, and fold it lengthwise over onto itself, making a strip of the tape that has no sticky side; effectively a strap, half the width of the tape.
        Thrusting-tip strap
      3. Next, you will use the two straps to affix the stack of discs to the end of the blade. The strap should extend down the sword (try not to run it directly along the blades), equally. You may want to compress the foam just a bit (less than 1/2”), and then throw a ring of strapping tape around the blade to hold the strap in place. Put the other strap on in the same manner, but at a 90-degree angle to the first strap (DO NOT COMPRESS THIS ONE).
        Thrusting-tip attached #1
      4. Once you have this done, wrap one ring of strapping tape around the foam, just tightly enough to hold them all together.
        Thrusting-tip strap #2
      5. Then, TIGHTLY, wrap a band or two of strapping tape and the joint of the foam and the rattan, half on the foam and half on the rattan, to reinforce the joint between the sword and the thrusting tip.
        Thrusting-tip reinforcement
    5. Define the blade - Lay a long line of your contrast-color duct tape along the length of both blades. If you have a thrusting-tip, do the same on it (just the very end - the flat face of the foam).
      Blade
      The blade tip
      Defining the blade
      Defining the blade
    6. Fill in the sword - Now, with your second color duct tape, cover all of the remaining rattan and foam, leaving just the contrast-color as the blade and tip. The blade should be about 3/4” wide or so.
      Contrast tape on blade
      Contrast tape close-up
      Contrast tape tip
    7. Clean up ends - Use the same color tape to clean up the tip and hilt ends of the blade. This will not only make the sword look better, but it will also hold the other tape in place and keep it from fraying.
      Tip of the blade cleaned up
      Hilt-side of blade cleaned up
      Contrast tape in place
    8. Carve the hilt - Using a wood rasp (using forward strokes only, rather than ‘scrubbing’ is far more effective), begin taking material away from the area you marked out for the hilt. I like to carve grooves for the heel of my hand as well as my thumb and fingers. NOTE: the black on the hilt pictured is from use - as you do this the underlying rattan should be light-colored, but will darken as you use your bavin.
      Carving the hilt (palm side)
      Carving the hilt (finger notches)
      Carving the hilt (complete)
    9. OPTIONAL: Attach the basket hilt - Using hose clamps, attach the basket hilt, securing the clamps as tightly as you can without breaking them. Using the second color of duct tape (NOT the contrast color), cover both hose clamps.

    Now you have your very own, personalized bavin! This weapon can be used in FLaK classes as well as sparring sessions. Depending on how often it is used for sparring, it should last anywhere from 3 months to several years.

    [ Read more ... ]

  • Whyflak

    July 29, 2014

    Why FLaK?

    If you're tired of going to the gym, doing aerobics in front of the TV, or of the same old excuses for not working out, and want to try something so totally unique that you might actually look forward to exercising, then Fight Like a Knight is for you!

    Fight Like a Knight classes are unlike anything you've done before. In each one-hour, low-impact, high-intensity class you will learn real medieval weapons-techniques stemming from 9th to 12th century combat styles cultivated through actual training and decades of research. These secrets were closely guarded by the knights of old and their trainers, but have been handed down through generations and are now made available to you!

    Great for actors, stunt professionals, re-enactors and medieval enthusiasts alike, and for ages 5 to 80, Fight Like a Knight is a blend of aerobic and isometric exercises embedded in a rigorous training regimen designed to give you solid, functional skills with a variety of period weapons, including:

    • Sword and Shield
    • Longswords/Broadswords
    • Great Swords (2-handed sword)
    • Daggers
    • Axes
    • Maces
    • Spears
    • Polearms (Glaive, Halberd, Great Axe, Ear-Spoon, etc.)

    [ Read more ... ]

Library

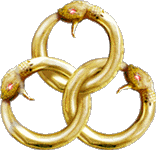
  • Tristouroborous

    September 6, 2018

    FLaK Precedence

    The FLaK Precedence is similar to the Eastern martial arts’ belt system, existing to provide students with goals and a way to measure progress through the program. This document describes the various levels of achievement that can be attained through training with Fight Like a Knight, as well as their respective titles, which track an individuals standing within the clan.

    The timelines of the levels are fluid, in that the estimated time spent at each level may change depending on the dedication to practice, focus on technique and, ultimately, the skill of the warrior. The Hersir (Knight) will offer the examination when he/she feels the student is ready to progress.

    While it is the Hersir’s sole call on whether or not a fighter passes a test and advances to the next level. The tests are given in a group setting and require a consensus before the accolade is granted. This is a core element to the FLaK Precedence, allowing the community to weigh in on whether it accepts the candidate at the sought level or not, demonstrating to the candidate that his/her peers see him/her as ready to move forward as well as being a potential inspiration for those lower in stature. This mutual acceptance is paramount to our values, and each member knows that he/she has the full support of the FLaK community behind each of their accomplishments.

    Successfully completing the exam to become a Thrall will garner a leather cord from which the student’s chain will grow. At the Folc level, the student will be taught the technique to craft the rings into our Chain of Station. From that point forward, with each new exam that is successfully completed, a new title will be bestowed, as will the rings necessary for the candidate to craft his/her next section of chain. The Chain of Station will be complete upon successfully obtaining the title of Thegn.

    Passing a test should feel like an achievement, pushing oneself to master the level’s forms, technique, and weaponry. Not passing a test should never be construed as a failure, but rather an opportunity to discover areas that need refinement. If the candidate does not pass a test, he/she should accept feedback from the Knight and his/her peers with the same humility and respect with which it was delivered, rising to the challenge of growth, seeking to improve the identified areas, rather than seeing a fault or failure. For we are stronger together than any individual is alone.


    TITLE
    meaning

    PROFICIENCY

    ACCOUTREMENT
    (martial arts equivalent)

    SUGGESTED EQUIPMENT

    Gjest
    guest

    N/A

    N/A
    (white belt)

    N/A

    Thrall
    slave

    Sword and Shield

    Leather Cord
    (yellow belt)

    • Rattan or Polypropylene sword
    • Shield

    Folc
    clan member

    Greatsword

    Copper Chain
    (green belt)

    • Kidney belt
    • Cuisses+Knees
    • Rattan greatsword

    Karl
    freeman

    Single Sword

    Bronze Chain
    (purple belt)

    • Spaulders or Pauldrons
    • Vambraces+Elbows
    • Rattan polearm

    Kriger
    young warrior

    Advanced Weapon and Shield

    Silver Chain
    (blue belt)

    • Gauntlets
    • Body armor
    • Secondary weapon

    Hirðman
    hearthman

    Advanced Great Weapon

    Gold Chain
    (brown belt)

    • Gorget
    • Helm
    • Other single-handed weapon

    Thegn
    mature warrior

    Dual Weapon

    Platinum Chain
    (red belt)

    • Demi-gauntlets

    Húskarl
    (HOOS-karl)

    Weapon and Shield Master

    Full chain with medallion:

    Eyes.png

    (black belt)
    • Design armor around time-period/culture/fighting-style

    Varangian
    (və-RAN-jee-ən)

    Great Weapon Master

    Full chain with medallion:

    Spikes.png

    (black belt)
    • Design armor around time-period/culture/fighting-style

    Ulfhéðnar
    (oolf-HYETH-nar)

    Dual Weapon Master

    Full chain with medallion:

    Spirals.png

    (black belt)
    • Design armor around time-period/culture/fighting-style

    [ Read more ... ]

  • Gladiatora longsword

    April 10, 2018

    The Squire's Progress

    The Squire’s Progress is our first form, covering basic footwork, sword blows, feints, positioning and mechanics. This is a fight, with an aggressor and a defender, and should be practiced with a partner whenever possible.

    Once the basic moves are learned, the student should focus on forceful, isometrically-controlled blows, while emphasizing proper body mechanics.

    As partners become more fluent with the progress, blows may be thrown at any point in order to keep the aggressor engaged and not just a robotic killing machine.

    STEP AGGRESSOR DEFENDER 1 Salute Salute 2 En garde 1 En garde 1 3 Flat-snap (#1) Block 4 Step into the offside (#4) Retreat, block 5 Block the shot, step into moulinet Flat-snap, retreat, garage door 6 Retreat (teardrop return), retreat (into en garde 1) Advance, advance 7 Feint, advance flat-snap (#1) Retreat, block 8 Two steps to the wrap (#30) Wrap-block 9 Retreat, retreat (sword stays) Advance, advance 10 Reset (big Tai Chi move to en garde 2) Hold (optional offside) 11 Step in to #6 (goofy-footed) Retreat, block 12 Quintain (block-blow-block) Quintain (blow-block-blow) 13 Step in (sword goes up) Retreat 14 Step in (sword crosses over head) Retreat 15 Step out (horse-stance, sell the leg shot) Block leg shot (leaving opening) 16 Slot shot Allow aggressor to land blow 17 Onslaught begins (teardrop return to flat-snap) Block 18 Offside (#4) Sword-block 19 Wrap (stepping in to en garde stance) Wrap-block 20 Belly slash Sweeping sword-block 21 Flat-snap (#1) Block 22 Offside (#4) Sword-block 23 Big conversion Block flat-snap (allowing blow to land) 24 Full retreat, retreat, retreat Advance, advance, advance 25 Reset (en garde 2) Should be out of range

    [ Read more ... ]